3. 최대 값을 가진 노드로부터 각 노드까지의 거리(지름)을 구하여 result 배열에 넣는다.
4. 그 배열에서 가장 큰 값이 최장 지름!
주의점 - 루트에서 루트, index에서 index일때는 0으로 초기화 시켜준다.
import sys
from collections import deque
input = sys.stdin.readline
sys.setrecursionlimit(10 ** 9)

N = int(input())
graph = [[] for _ in range(N+1)]
result = [0 for _ in range(N+1)]

max = 0

for i in range(N-1):
    a,b,c = map(int, input().split())
    graph[a].append([b,c])
    graph[b].append([a,c])

def bfs(i, graph, result):
    q = deque()
    for j in range(len(graph[i])):
        q.append(graph[i][j])
    while q:
        a,b = q.popleft()
        if result[a] == 0:
            result[a] = result[i] + b
            bfs(a, graph, result)

bfs(1, graph, result)
result[1] = 0

index = 0
tmp_max = 0
for i in range(len(result)):
    if tmp_max < result[i]:
        tmp_max = result[i]
        index = i

result = [0 for _ in range(N+1)]
bfs(index, graph, result)
result[index] = 0

tmp_max = 0
for i in range(len(result)):
    if tmp_max < result[i]:
        tmp_max = result[i]

print(tmp_max)
여기서 나는 pip install pyaudio가 안돼서 애를 먹었는데 window10환경이라 그럴 수 있다고 한다. 설치되지 않는다면 밑의 명령어들을 순서대로 실행시키면 된다.
pip install pipwin
pipwin install pyaudio
2. python 코드 실행
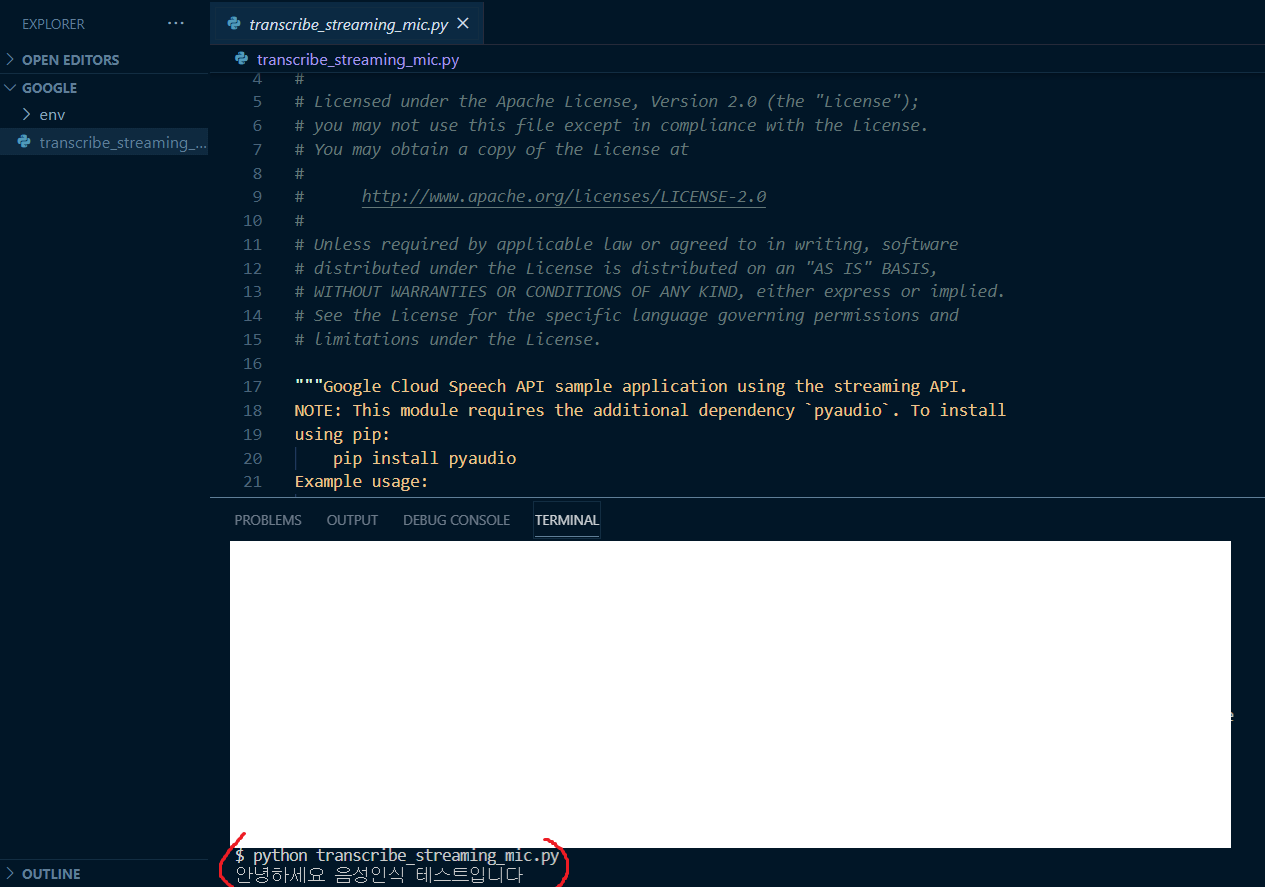
아래의 코드를 환경 설정 해주었던 폴더의 env 밖에 넣어준다. (참고로 저는 vscode 사용) 환경설정에 있던 링크에서처럼 python 파일명.py를 하고 마이크에 말을 하면 텍스트로 나오는 모습을 볼 수 있다.
#!/usr/bin/env python

# Copyright 2017 Google Inc. All Rights Reserved.
#
# Licensed under the Apache License, Version 2.0 (the "License");
# you may not use this file except in compliance with the License.
# You may obtain a copy of the License at
#
#      http://www.apache.org/licenses/LICENSE-2.0
#
# Unless required by applicable law or agreed to in writing, software
# distributed under the License is distributed on an "AS IS" BASIS,
# WITHOUT WARRANTIES OR CONDITIONS OF ANY KIND, either express or implied.
# See the License for the specific language governing permissions and
# limitations under the License.

"""Google Cloud Speech API sample application using the streaming API.
NOTE: This module requires the additional dependency `pyaudio`. To install
using pip:
    pip install pyaudio
Example usage:
    python transcribe_streaming_mic.py
"""

# [START speech_transcribe_streaming_mic]
from __future__ import division

import re
import sys

from google.cloud import speech
from google.cloud.speech import enums
from google.cloud.speech import types
import pyaudio
from six.moves import queue

# Audio recording parameters
RATE = 16000
CHUNK = int(RATE / 10)  # 100ms


class MicrophoneStream(object):
    """Opens a recording stream as a generator yielding the audio chunks."""
    def __init__(self, rate, chunk):
        self._rate = rate
        self._chunk = chunk

        # Create a thread-safe buffer of audio data
        self._buff = queue.Queue()
        self.closed = True

    def __enter__(self):
        self._audio_interface = pyaudio.PyAudio()
        self._audio_stream = self._audio_interface.open(
            format=pyaudio.paInt16,
            # The API currently only supports 1-channel (mono) audio
            # https://goo.gl/z757pE
            channels=1, rate=self._rate,
            input=True, frames_per_buffer=self._chunk,
            # Run the audio stream asynchronously to fill the buffer object.
            # This is necessary so that the input device's buffer doesn't
            # overflow while the calling thread makes network requests, etc.
            stream_callback=self._fill_buffer,
        )

        self.closed = False

        return self

    def __exit__(self, type, value, traceback):
        self._audio_stream.stop_stream()
        self._audio_stream.close()
        self.closed = True
        # Signal the generator to terminate so that the client's
        # streaming_recognize method will not block the process termination.
        self._buff.put(None)
        self._audio_interface.terminate()

    def _fill_buffer(self, in_data, frame_count, time_info, status_flags):
        """Continuously collect data from the audio stream, into the buffer."""
        self._buff.put(in_data)
        return None, pyaudio.paContinue

    def generator(self):
        while not self.closed:
            # Use a blocking get() to ensure there's at least one chunk of
            # data, and stop iteration if the chunk is None, indicating the
            # end of the audio stream.
            chunk = self._buff.get()
            if chunk is None:
                return
            data = [chunk]

            # Now consume whatever other data's still buffered.
            while True:
                try:
                    chunk = self._buff.get(block=False)
                    if chunk is None:
                        return
                    data.append(chunk)
                except queue.Empty:
                    break

            yield b''.join(data)


def listen_print_loop(responses):
    """Iterates through server responses and prints them.
    The responses passed is a generator that will block until a response
    is provided by the server.
    Each response may contain multiple results, and each result may contain
    multiple alternatives; for details, see https://goo.gl/tjCPAU.  Here we
    print only the transcription for the top alternative of the top result.
    In this case, responses are provided for interim results as well. If the
    response is an interim one, print a line feed at the end of it, to allow
    the next result to overwrite it, until the response is a final one. For the
    final one, print a newline to preserve the finalized transcription.
    """
    num_chars_printed = 0
    for response in responses:
        if not response.results:
            continue

        # The `results` list is consecutive. For streaming, we only care about
        # the first result being considered, since once it's `is_final`, it
        # moves on to considering the next utterance.
        result = response.results[0]
        if not result.alternatives:
            continue

        # Display the transcription of the top alternative.
        transcript = result.alternatives[0].transcript

        # Display interim results, but with a carriage return at the end of the
        # line, so subsequent lines will overwrite them.
        #
        # If the previous result was longer than this one, we need to print
        # some extra spaces to overwrite the previous result
        overwrite_chars = ' ' * (num_chars_printed - len(transcript))

        if not result.is_final:
            sys.stdout.write(transcript + overwrite_chars + '\r')
            sys.stdout.flush()

            num_chars_printed = len(transcript)

        else:
            print(transcript + overwrite_chars)

            # Exit recognition if any of the transcribed phrases could be
            # one of our keywords.
            if re.search(r'\b(exit|quit)\b', transcript, re.I):
                print('Exiting..')
                break

            num_chars_printed = 0


def main():
    # See http://g.co/cloud/speech/docs/languages
    # for a list of supported languages.
    language_code = 'ko-KR'  # a BCP-47 language tag

    client = speech.SpeechClient()
    config = types.RecognitionConfig(
        encoding=enums.RecognitionConfig.AudioEncoding.LINEAR16,
        sample_rate_hertz=RATE,
        language_code=language_code)
    streaming_config = types.StreamingRecognitionConfig(
        config=config,
        interim_results=True)

    with MicrophoneStream(RATE, CHUNK) as stream:
        audio_generator = stream.generator()
        requests = (types.StreamingRecognizeRequest(audio_content=content)
                    for content in audio_generator)

        responses = client.streaming_recognize(streaming_config, requests)

        # Now, put the transcription responses to use.
        listen_print_loop(responses)


if __name__ == '__main__':
    main()
# [END speech_transcribe_streaming_mic]
import java.util.ArrayList;
import java.util.HashMap;
import java.util.Iterator;
import java.util.List;
import java.util.Set;

// DTO와 DB가 일치하지 않으므로 HashMap List 사용
// Post 자리에는 사용될 객체 이름을 넣어주면 된다. ( 저는 임의로 Post 사용! )
List<HashMap<Object, Post>> result = sqlSession.selectList(NS+"searchPost");

// 가져온 객체들을 저장해서 반환 할 새로운 배열을 선언
List<Post> list = new ArrayList<Post>();

// 받아온 HashMap List를 HashMap에 차례로 넣어준다.
for(HashMap<Object, Post> hash : result){
    // Hash의 value값을 조회 할 key값 가져오기
        Set key = hash.keySet();
    // Iterator에 key를 담는다.
        Iterator iterator = key.iterator();

    // list에 하나씩 담아 줄 새로운 객체 생성
        Post post = new Post();

        // setter 사용
        // iterator.next()를 통하여 값을 접근한다.
        post.setTitle(hash.get(iterator.next()).toString());
        post.setContent(hash.get(iterator.next()).toString());

        // setter를 통하여 값을 다 넣어준 후에는 list에 추가해주기
        list.add(post);

        // hasNext를 통해 다음 KEY값들의 모음으로 넘어간다.

      }
      return list;
}
4. 기타 기억할 점
가져오는 값이 Int형일 경우 Integer.parseInt(가져올 값)
그 외 형 변환 오류 발생시 (가져올 값). getClass(). getName()으로 자료형 확인해서 맞춰주기